Render Map
Showing a map is one of the most common tasks when developing location-aware applications. It is also a task, relatively easy to achieve, given the vast collection of free open source map control libraries available.
Most, if not all, of those libraries usually let the developers specify one ore more layer sources in order to show a map. Therefore, the task of showing a map is a matter of configuring a layer source so that it calls the appropriate API to get map data.
Note
GeoIntelligence does not provide a map control library. Trying to implement and maintain such a library would be like trying to reinvent the wheel given the available options nowadays. There are numerous 3rd party libraries that are mature, extensively tested, used by thousands of developers and highly configurable.
GIMS offers a set of APIs that allow integrating GeoIntelligence maps right into your application by configuring a layer source that makes the appropriate API calls.
Rendering a Tiled map
The most commonly used layer source is the one using a XYZ scheme. In this case the map is represented as an 3-dimensional pyramid built with image tiles. Map control libraries track the map viewport and are able to detect what tiles are required in order to render the map. Getting a tile is a matter of specifying the index in the three axes (x, y, z).
In this sample we are using openlayers 3 map library and the GIMS Tiling API (part of the Mapper Server Maps API described here).
Step 1: Getting an API Key
In order to render the map developers have to acquire an API key. Read more about getting an API key for GI Mapper Server here.
Step 2: Select an authorization Option
After getting your API Key use one of the two available authorization schemes in order to make the API calls:
Url query:
The first and easiest option is passing the API key using the api_key query parameter. It is only a matter of building the tile url appropriately. For example when using openlayers 3 the tile source can be configured as followed:
let source = new ol.source.XYZ({
                // Specify the url template
    url: baseHost + '/api/m/maps/v2/tiles/{z}/{x}/{y}?ofs=8&api_key='+apiKey,
                // Use attribution for map tiles
    attributions: [new ol.Attribution({
        html: 'Maps © ' + new Date().getFullYear() + ' geointelligence, rendered with GI MapServer'
    })],
});
Note
Developers are required to show GeoIntelligence attribution when using GIMS to render a map
HTTP Header:
The second option is passing the API key using the Authorization-Token HTTP header. In this case specifying the url template is not enough, the developer is required to specify a function that will build the request and handle the response.
let source = new ol.source.XYZ({
                // Specify the url template without the api_key query parameter
    url: baseHost + '/api/m/maps/v2/tiles/{z}/{x}/{y}?ofs=8',
                // use attribution for map tiles
    attributions: [new ol.Attribution({
        html: 'Maps © ' + new Date().getFullYear() + ' geointelligence, rendered with GI MapServer'
    })],
                // specify how the tile is loaded
    tileLoadFunction: function (tile, url) {
        var xhr = new XMLHttpRequest;
        xhr.open('GET', url, true);
        xhr.setRequestHeader('Authorization-Token', apiKey);
        // new browsers (XMLHttpRequest2-compliant)
        if ('responseType' in xhr) {
            xhr.responseType = 'arraybuffer';
        }
        // old browsers (XMLHttpRequest-compliant)
        else if ('overrideMimeType' in xhr) {
            xhr.overrideMimeType('text/plain; charset=x-user-defined');
        }
        // IE9 (Microsoft.XMLHTTP-compliant) though IE 9 is not supported
        else {
            xhr.setRequestHeader('Accept-Charset', 'x-user-defined');
        }

        xhr.onload = function () {
            if (this.status != 200) {
                throw new Error(this.statusText);
            }
            var d = 'data:image/png;base64,' + btoa(String.fromCharCode.apply(null, new Uint8Array(this.response)));
            tile.getImage().src = d;
        }

        xhr.send();
    }
});
Step 3: Configure the map
Finally rendering the map requires a couple of HTML and JavaScript lines. For more information about using openlayers, see openlayers doc:
HTML:
<div id="map" style="height:350px"></div>
JavaScript:
let map = new ol.Map({
    loadTilesWhileInteracting: true,
    loadTilesWhileAnimating: true,
    controls: ol.control.defaults({
        attributionOptions: {
            collapsible: true
        }
    })
    ,
    layers: [
        new ol.layer.Tile({
            source: source
        }),
    ],
    target: 'map',
    view: new ol.View({
        enableRotation: false,
        projection: 'EPSG:3857',
        center: ol.proj.fromLonLat([mapLocation.lon, mapLocation.lat], 'EPSG:3857'),
        zoom: 12,
        minZoom: 4,
        maxZoom: 19
    })
});
The map should be visible as shown in the following image:
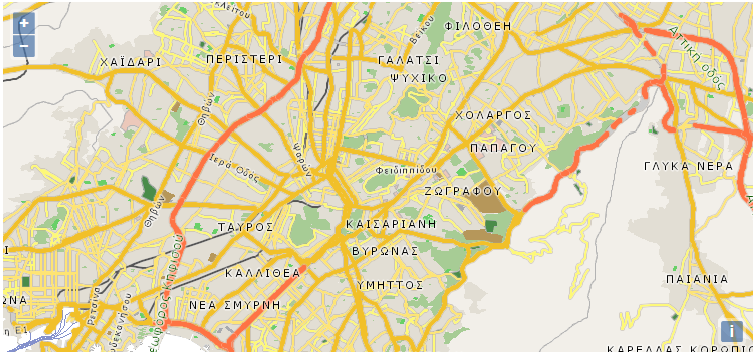
A tiled map rendered by GIMS using openlayers 3